Installation
vTAP system architecture
Abbreviations
- VDS: Virtual Distributed Switch
- VCSA: vCenter Server Appliance
- vNPB: Virtual Network Packet Broker
- VM: Virtual Machine
Overview
Profitap vTAP consists of two components: the vTAP Manager, and the vNPB (or vBroker).
The vTAP Manager is an orchestrator for the virtual TAPs and filtering machines (vNPB). It has complete visibility over the entire virtual environment: VMs, VDS, hosts, and VCSA.
The vNPB must be deployed on the same host as the tapped VMs, while the vTAP Manager can be deployed on any host having a constant connection to the VCSA.
Prerequisites
- vSphere 6.5, 7, or 8
- Virtual Distributed Switch
- vCenter Server Appliance
Minimum resource requirements
- vTAP Manager: 1 vCPU, Memory 2 GB, Hard Drive 12 GB
- vNPB: 1 vCPU, Memory 2 GB, Hard Drive 12 GB
Limitations
Profitap vTAP supports up to 2048 different MAC addresses per vNPB (i.e. per host), meaning that up to 2048 tapping points can be used on one host.
VMware supports up to 10 virtual network interfaces per VM. 9 of these interfaces are available for vNPBs to send and receive tapped data, meaning that up to 9 Virtual Distributed Switches per host can be used for receiving tapped data.
vTAP deployment
Deploying the vTAP on a host will deploy the vTAP Manager. vNPB deployment is done automatically by the vTAP Manager on any host on which it is required by the filter rules (see Rule Sets).
The Profitap vTAP release consists of the following files:
- profitap_vtap.ovf
- profitap_vtap.vmdk
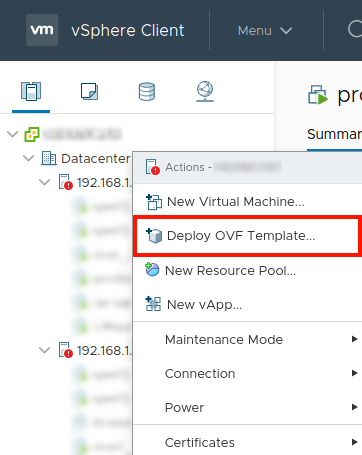
To deploy the vTAP, connect to your vSphere client, select Deploy OVF Template on the desired ESXi host, and follow the wizard.
Select an OVF template
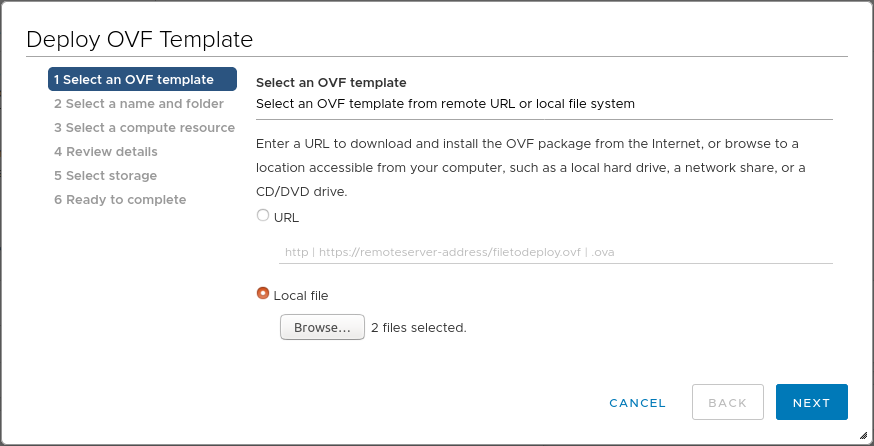
- Select Local file
- Click Browse
- Navigate to the location of the vTAP files
- Select both files (OVF and VMDK)
- Click Next
Note: It is important to select both the OVF and VMDK file. To select multiple files, use CTRL on PC, and CMD on Mac.
Select a name and folder
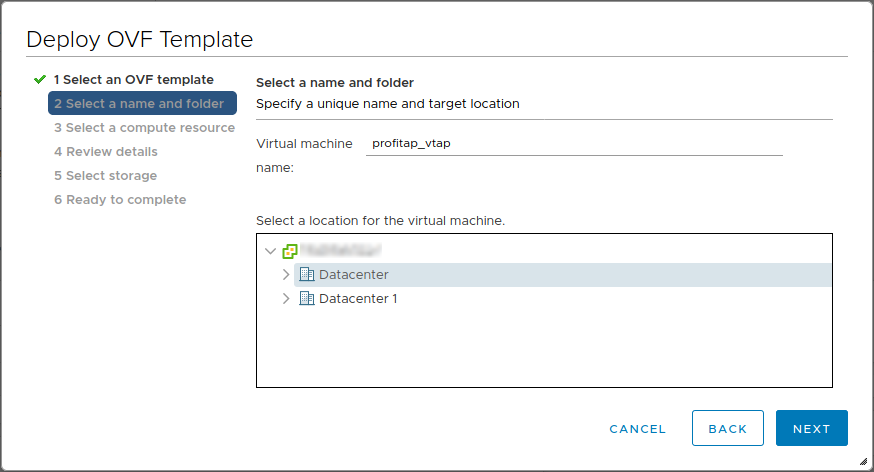
- Enter a VM name
- The appropriate VM location should already be selected, but a different one can be selected if desired
- Click Next
Select a compute resource
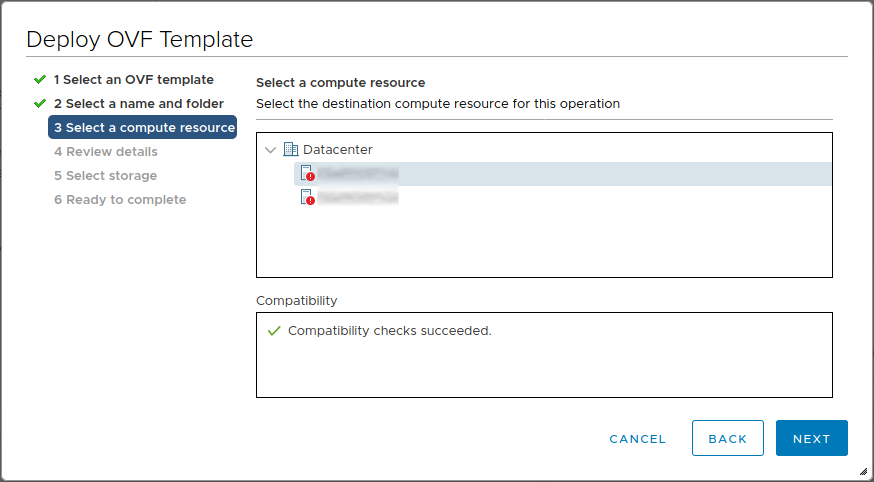
- The appropriate compute resource should already be selected, but a different one can be selected if desired
- Click Next
Review details
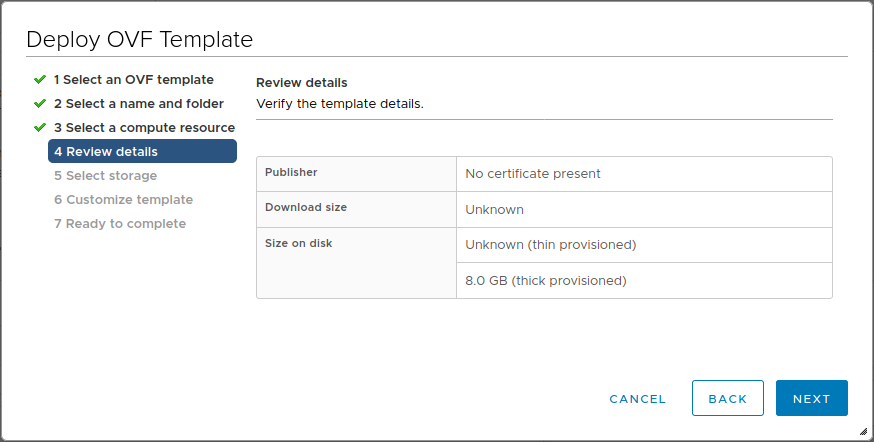
- Verify the template details
- Click Next
Select storage
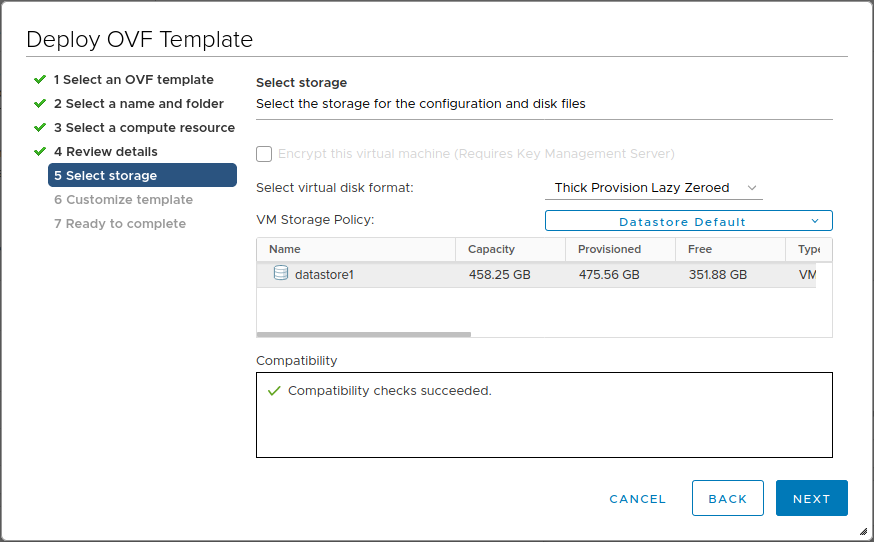
- Select the storage for the configuration and disk files
- Click Next
Select networks
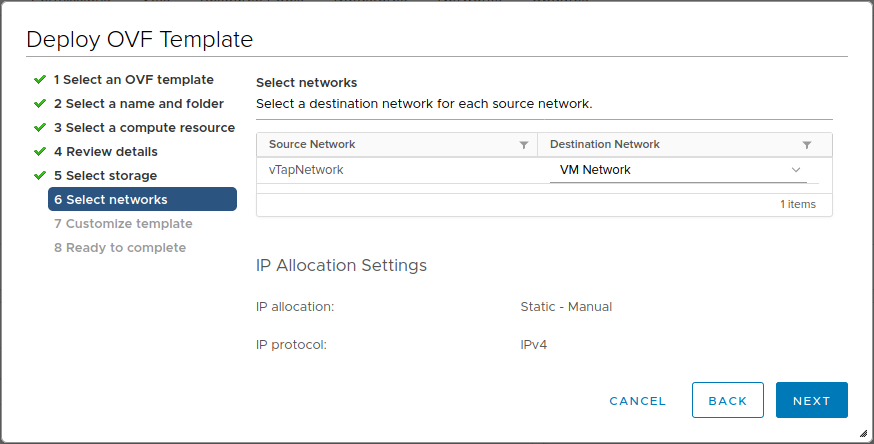
- Select the network for the vTAP Manager VM to connect to. The network must be reachable by the user (via HTTPS), by the VCSA, and by the ESXi hosts where vNPBs will be deployed.
- Click Next
Customize template
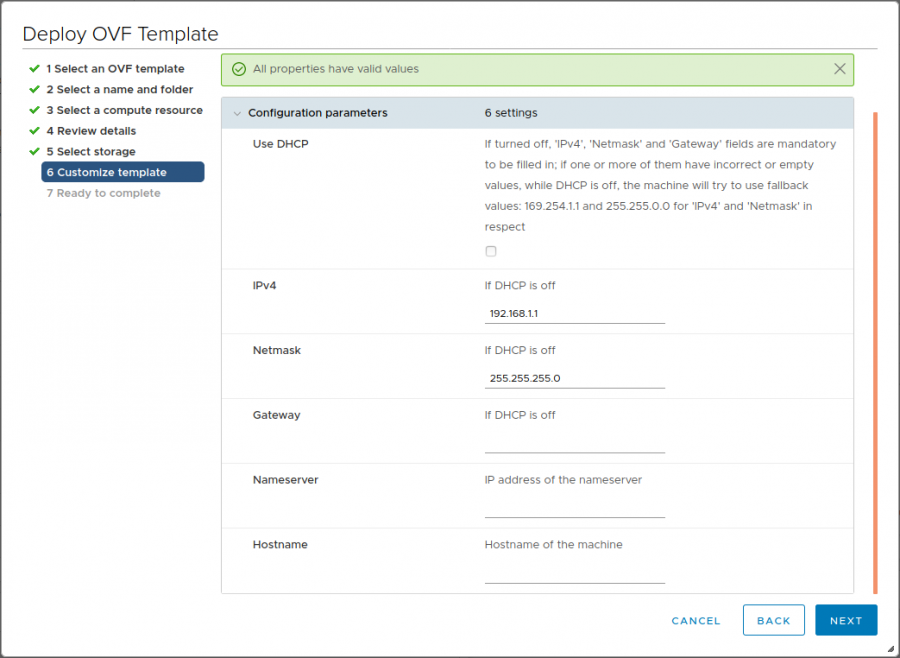
Configure network settings for the vTAP Manager on this window.
If Use DHCP is enabled, the vTAP Manager will attempt to get network settings from a DHCP server. If the vTAP Manager cannot receive network settings from a DHCP server (no DHCP server available, or no allocatable IP addresses available), it will use 169.254.1.1 as fallback IP and 255.255.0.0 as netmask. The IPv4, Netmask, and Gateway fields are ignored.
If Use DHCP is disabled, the IPv4 and Netmask fields are required. If these fields are empty, or filled but malformed, the vTAP Manager will use 169.254.1.1 as fallback IP and 255.255.0.0 as netmask.
Ready to complete
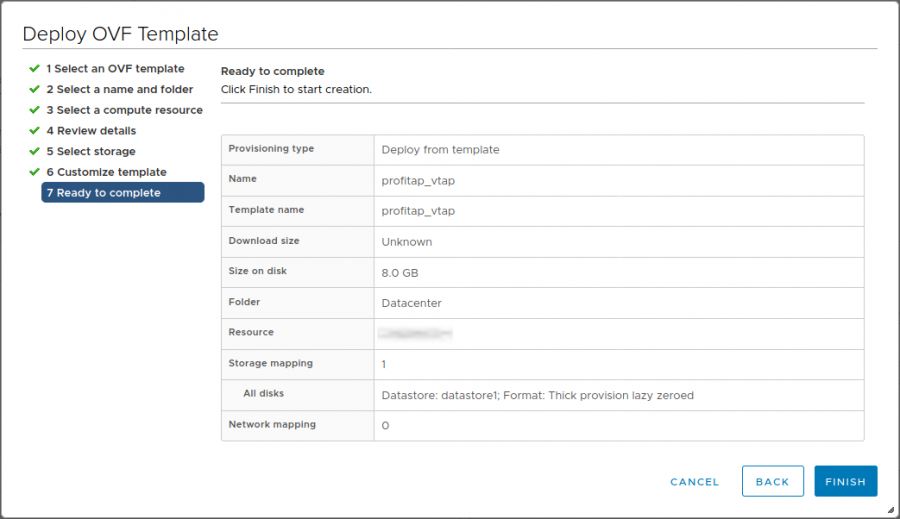
Review the template deployment summary and click Finish.
Adjust network settings
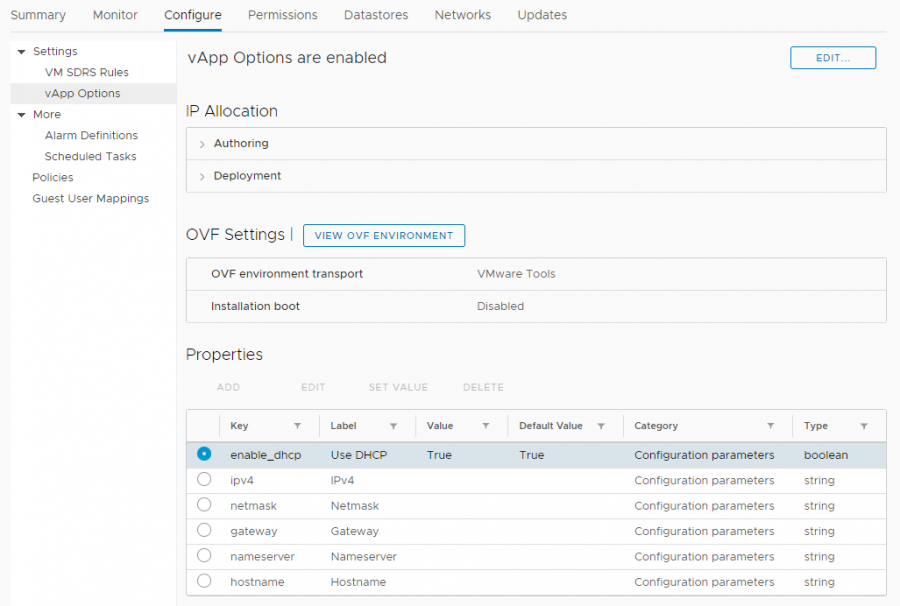
Network settings can be adjusted in the vTAP Manager VM's properties.
With the vTAP Manager VM turned off, navigate to Configure > Settings > vApp Options > Properties, and adjust these properties as needed.
The Use DHCP option can be enabled or disabled in this window.
If Use DHCP is enabled, the IPv4, Netmask, and Gateway properties are ignored.
If Use DHCP is disabled, the IPv4 and Netmask properties are required.
The vTAP Manager VM checks these properties when it is booted, and uses them if they have been changed since the last boot. Modifying the VM's network settings can also be done from within the vTAP Manager's user interface, in which case these displayed properties will not be updated, although they can still be modified, which will update the VM's network settings the next time it is booted.
NOTE: If the vTAP Manager is migrated (either manually, or during a VMware environment upgrade) the vApp options will need to be recreated.
With the vTAP Manager VM turned off, navigate to Configure > Settings > vApp Options > Properties, and recreate these properties as needed (see image above).
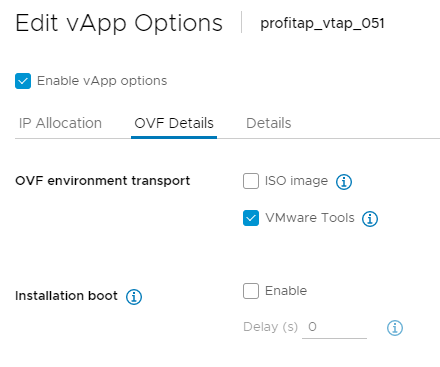
Additionally, the VMware Tools option needs to be enabled. To do so, click the EDIT button at the top right corner of the vApp Options page, navigate to the OVF Details tab, and tick the VMware Tools checkbox.
IP address
The vTAP Manager VM's IP address will appear in IP Addresses on the VM's Summary page. Note that it may take 1-2 minutes to appear after the VM has been turned on.