Cloud TAP - Kubernetes
This article describes the Supervisor's Cloud TAP module, accessed via the Cloud TAP menu item, as pertains to tapping Kubernetes clusters. Kubernetes clusters can be managed further in the sections described in Traffic Management and Event Monitoring.
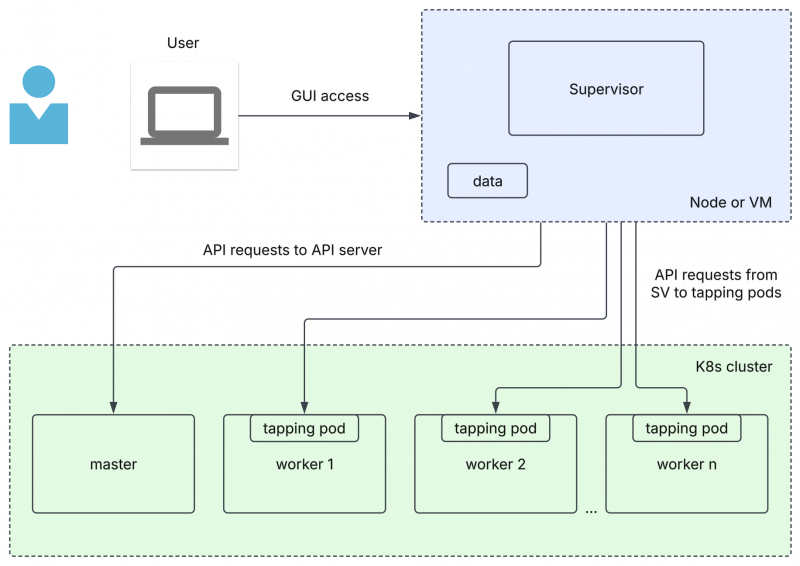
Communication between Supervisor and K8s clusters
System requirements and prerequisites for Kubernetes tapping pods
- Processor for worker node >= 2 vCPU;
- RAM: 100 MB;
- Disk space: 200 MB;
- Linux kernel >= 5.7.x;
- Azure CNI on AKS (Azure Kubernetes Service).
Registered Clusters
The Registered Clusters tab of the Cloud TAP page provides an overview of the Kubernetes and Azure VM environments managed by the Supervisor, general information about them, and their status.
Each virtual environment can be assigned to a Network. Networks can be used to isolate devices and virtual environments in logical networks in the Traffic Management page, with each Network operating with its own set of traffic rules.
Clicking on an environment provides additional information about this environment, and the ability to create pod groups or interface groups and tunnel destinations prior to Traffic Management.
Clicking on a network navigates to this network, listing the environments it contains. Clicking the Home ![]() button navigates back to the root.
button navigates back to the root.
From this dashboard, environments and networks can be added, modified, or removed.
To add a new environment, click the Add Virtual Environment button in the top right corner of the interface, select Azure or Kubernetes and enter the environment's information in the Add Virtual Environment window. Select a network in this window to add the environment to this network. The environment's information can be changed at a later time by clicking the environment's Edit ![]() button.
button.
To create a network, click the Add Network button, and enter the network name in the Add Virtual Network window. The network's name can be changed at a later time by clicking the network's Edit button.
Adding a Virtual Environment
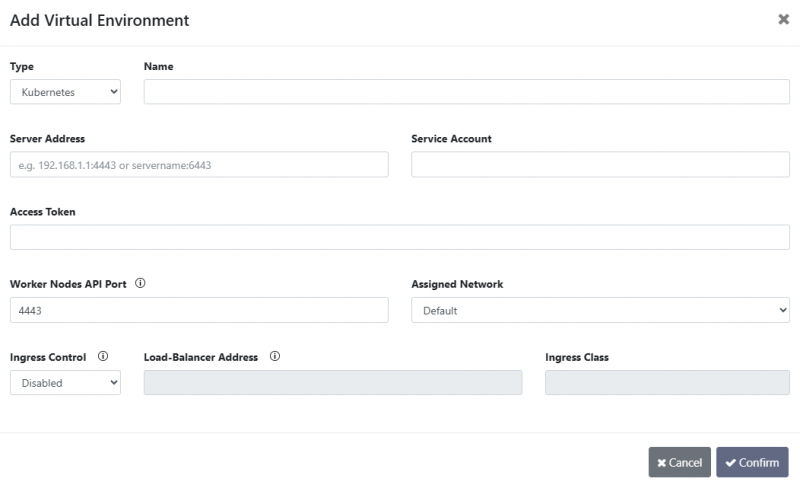
Add Virtual Environment window - Kubernetes
- Type: The type of environment [Azure/Kubernetes].
- Name: A name for the virtual environment.
- Server Address: The IP address or server name of the kubernetes API server. The L4 port can be specified if required by the server configuration.
- Service Account: The service account under which the token was created. This service account must be within the
profitapnamespace. - Access Token: This token will be used to access the kubernetes master node. Please refer to the following article for creating the token: Creating token for Supervisor access.
- Worker Nodes API Port: The port number on the worker node(s) that the tapping pod will listen on. Supervisor will communicate with the tapping pod through this port, so it should be made accessible and not blocked.
- Assigned Network: The virtual network that the virtual environment will be assigned to.
- Ingress Control: In case an ingress controller is deployed on the kubernetes cluster.
- Disabled: No ingress controller.
- Default: Default ingress class configured on the cluster.
- Custom: Specific ingress class associated with the chosen ingress controller.
- Load-Balancer Address: The IP address or server name of the load balancer service. The L4 port can be specified if necessary.
- Ingress Class: Name of the ingress class (e.g. nginx).
The default ingress class can be viewed using the following command (if configured):
kubectl get ingressclass -o=jsonpath='{range .items[*]}{.metadata.name}{"\t"}{.metadata.annotations.ingressclass\.kubernetes\.io/is-default-class}{"\n"}{end}'
Source Pod Groups
Pod Groups are groups of Kubernetes pods monitored by Cloud TAP and used as a source of traffic to be sent to analysis tools. Two types of pod groups can be created: Static and Dynamic. Static Pod Groups contain specific pods that were manually selected. Dynamic Pod Groups contain any pods matching a name filter, and are automatically updated to include new pods which name matches that filter.
To create a pod group on a Kubernetes cluster, navigate to the Cloud TAP > Registered Clusters page, click a Kubernetes cluster to open its details window, and click the Create Static Pod Group or Create Dynamic Pod Group button:
- For Static Pod Groups, set a name, select which traffic direction to monitor (ingress, egress, or both), and select the pods to include in the group.
- For Dynamic Pod Groups, set a name, select which traffic direction to monitor (ingress, egress, or both), and set a Match Filter to match the name of the pods to automatically include in the group.
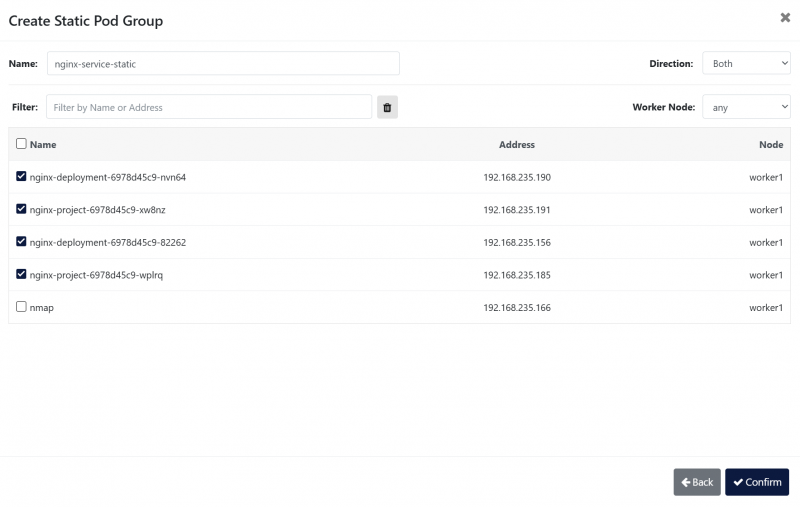
Create Static Pod Group window
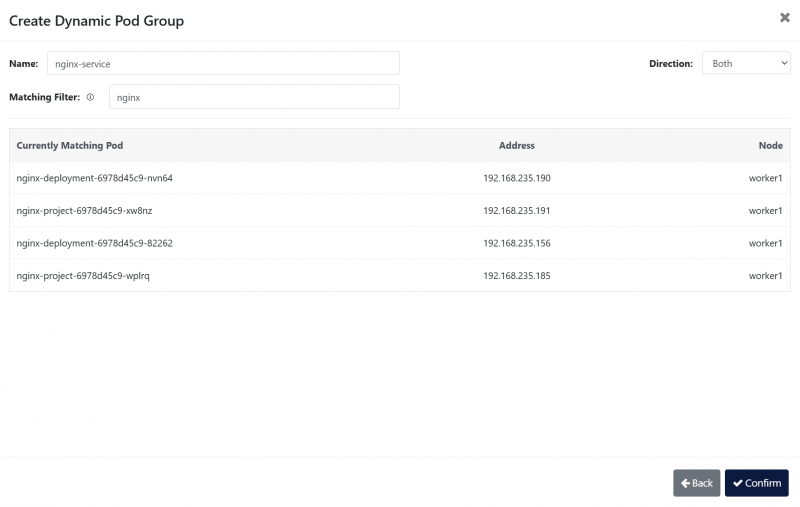
Create Dynamic Pod Group window
Tunnel Destinations
Tunnel Destinations define where the monitored traffic from the configured pod groups will be sent, encapsulated in a GRE-TAP, VXLAN, or ERSPAN tunnel. This can for instance be an X2-Series device on which a Tunnel Termination port group was created, from where it can then be forwarded to analysis tools via Traffic Rules.
Tunnel destination creation process:
- Navigate to the Cloud TAP > Registered Clusters page.
- Click a Kubernetes cluster to open its details window.
- Click the Create Destination button.
- Set a name.
- Set a destination IPv4 address.
- Select the tunnel type (GRE-TAP/VXLAN/ERSPAN).
- (For GRE-TAP) Set a GRE key.
- (For VXLAN) Set a VNI, source UDP port, and destination UDP port.
- (For ERSPAN) Set an ERSPAN session ID and ERSPAN index.
- (Optional) Enable Force MTU Size and set the desired MTU.
- Click the Confirm button.
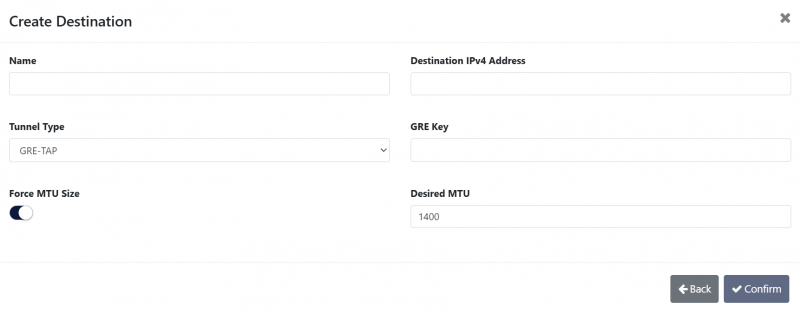
Creating a GRE-TAP tunnel destination on a K8s cluster
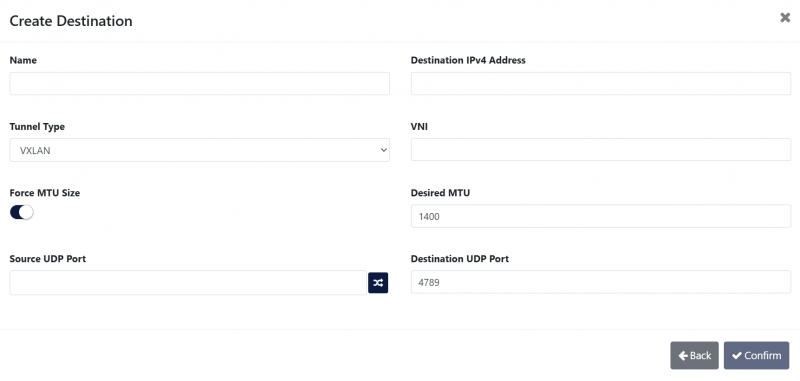
Creating a VXLAN tunnel destination on a K8s cluster

Creating an ERSPAN tunnel destination on a K8s cluster
You can then create Traffic Rules to send traffic from specific pod groups to the tunnel destination configured above.
To link a K8s cluster to an X2-Series device, create a Tunnel Termination port group on that device with the same IPv4 address as the one specified above, then create an uplink between this port group and the tunnel destination configured above. You can then create Traffic Rules to send traffic from specific pod groups to any destination linked through the X2-Series device.

Creating an uplink between a K8s tunnel destination and a Tunnel Termination port group on an X2-Series device
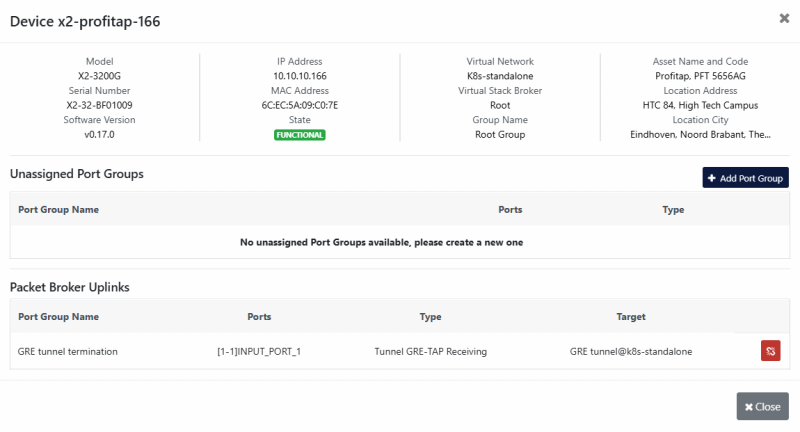
Confirming the uplink creation displays the uplink in the list of packet broker uplinks and removes the port group used from the list of unassigned port groups
Cluster Topology
The Cluster Topology tab of the Cloud TAP page gives a view of the topology of registered Kubernetes clusters and Azure VM environments. Select the environment to view by selecting it in the Selected Environment drop-down menu in the top left corner.
