Traffic management
The Traffic Management page allows users to define traffic rules operating on an interconnected fleet of Profitap XX-Series and X2-Series packet brokers. The traffic rules can be used to forward, aggregate and replicate traffic from different devices. Profitap Supervisor will automatically generate and deploy the necessary device configuration to achieve the desired result.
Port groups, packet broker uplinks and external devices can be prepared from the Device Monitoring > Registered Devices page prior to creating traffic rules.
The Help window (accessed from the sidebar) can assist you in setting up the different traffic management components.
Port groups
Profitap XX-Series and X2-Series packet brokers interfaces can be organized in port groups in order to be used together. A port group is used to aggregate incoming traffic and/or to distribute (load balance) the outgoing packets. Note that each physical port can only be used within a single port group.
To create a port group, navigate to the Device Monitoring > Registered Devices page, click the device for which to create a port group to open its device details window, and click the Add Port Group button to open the Add Port Groups window. In this window, give a name to the port group, select one or more ports, and click the Confirm button.
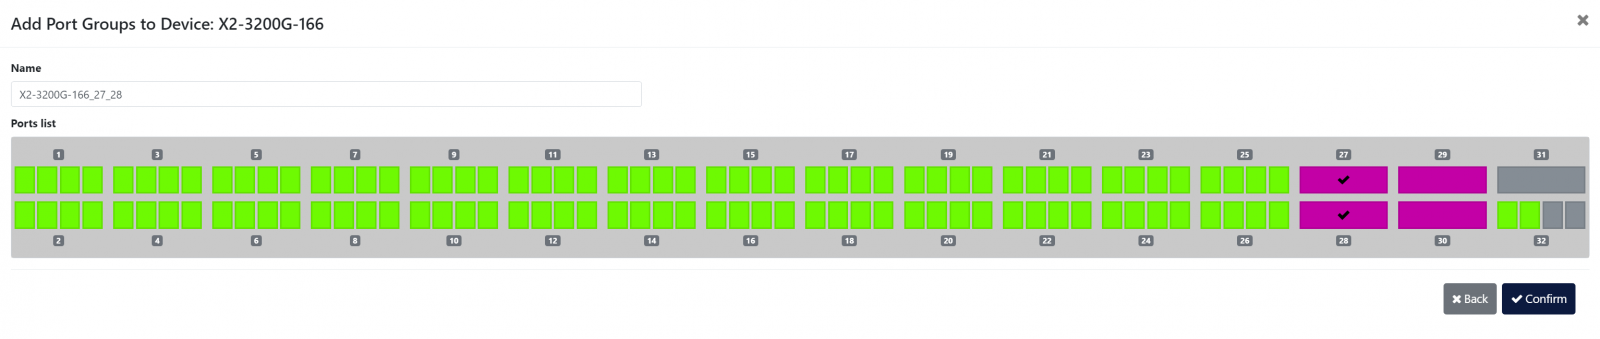
Add Port Group window
Port groups that are not currently used in a packet broker uplink or connected to an external device are listed in the Unassigned Port Groups section of the device details window. From this listing, port groups can be edited or deleted, or they can be added to a packet broker uplink or connected to an external device.

Device Details window showing the newly created port group
Packet broker uplinks
Profitap Supervisor can help you monitor and control how the packet brokers hierarchy is interconnected. The physical connections between the packet brokers are called uplink, and are used to distribute the traffic across the XX-Series or X2-Series fleet.
To add an uplink, navigate to the Device Monitoring > Registered Devices page, click one of the devices for which to create an uplink to open its device details window, click the [+] button next to an unassigned port group and select Add Uplink.
Click the [+] button next to an unassigned port group and select Add Uplink to create an uplink using this port group
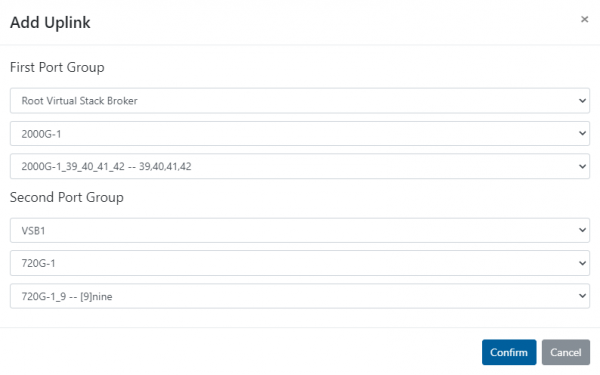
Select the Virtual Stack Broker, and the packet broker device and port group to which to connect the uplink, then click the confirm button.

Uplinks are created between port groups of separate devices, and thus an unassigned port group must exist on each of the devices you wish to link.
Once an uplink has been created, both devices will appear in the graphical view on the Traffic Management page. They can be arranged by clicking and dragging them, and the uplink line shape can be changed via the Uplink Line Shape drop-down menu at the top left of the page.
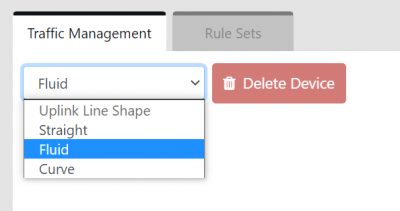
Uplink Line Shape drop-down menu
Clicking on a device in the graphical view opens its Device Details window.
Right-clicking a device in the graphical view provides the option to open the Device Details window, create an uplink, or add an external device.
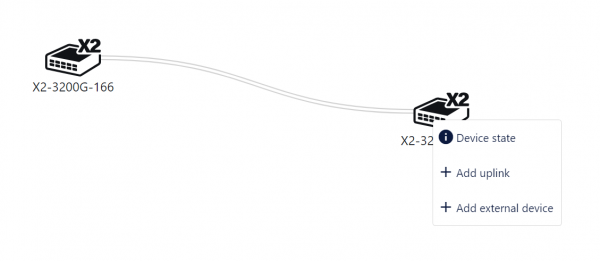
Packet broker device options menu
External devices
Since Profitap packet brokers are likely not the only components of your visibility infrastructure, Profitap Supervisor allows you to map external devices connected to your XX-Series and X2-Series devices in the visibility network topology. These can be used as source or destination for your traffic rules.
To add an external device, navigate to the Device Monitoring > Registered Devices page, click one of the devices to which to connect an external device to open its device details window, click the [+] button next to an unassigned port group and select Add External Device. Give the external device a name and select its type, then click the confirm button.

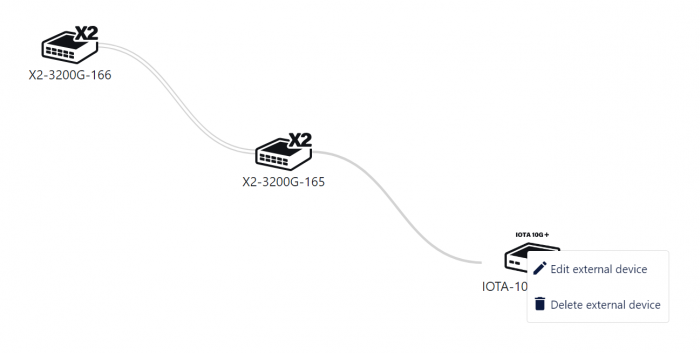
External devices can also be added by right-clicking a device in the graphical view and selecting Add external device. Clicking an external device in the graphical view will open the Edit external device window, and right-clicking it provides the option to edit or delete it.
Virtual stack broker
As your NPB hierarchy grows, it will be helpful to group your devices in order to reduce your topology complexity. Profitap Supervisor allows you to create Virtual Stack Brokers to organize multiple packet brokers together, linked with each other. This new entity can be used as a logical device, which can be connected to external devices or other uplinks. Note that VSBs are empty at their creation. To use them, you will need to define an uplink between a device already existing in your topology and a new one to add to the empty VSB.
To create a VSB, click the Add Virtual Stack Broker button, name it, and click Confirm.
Devices can now be added to the VSB by selecting it in the Add Uplink window.
Rule sets
Profitap Supervisor uses the registered topology of Devices, External Devices and VSBs to allow you to perform advanced cross-device traffic management. The configuration of all these elements is covered by the Supervisor Rule Sets. These are traffic management profiles that can be created, cloned, swapped and modified. Any time a new Rule Set is applied, the Supervisor system will make sure that the configuration is automatically deployed on the targeted devices.
The Rule Sets tab displays the list of existing sets of rules, allowing users to:
 Create a rule set
 Clone a rule set
 Configure a rule set
 Apply a rule set
 Rename a rule set
 Delete a rule set
Multiple Rule Sets can be deleted by selecting one or more Rule Sets and pressing the Delete Rule Sets button.
Note: In order to apply changes to the active rule set, it is necessary to apply the rule set again.
If a Rule Set is currently active, it is displayed at the bottom of the Traffic Management tab. It can be deactivated via the Deactivate Rule Set button.
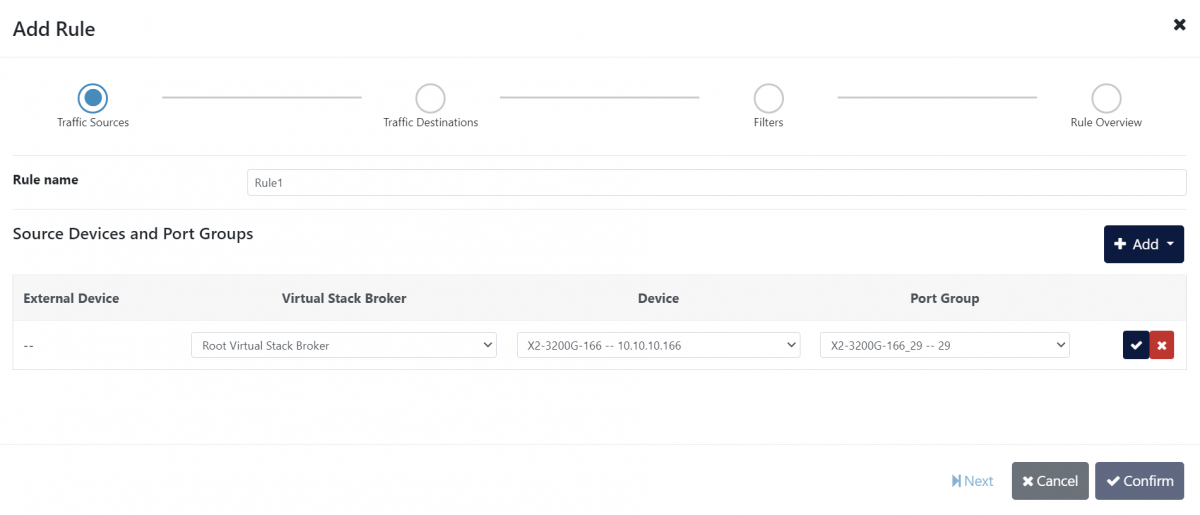
Traffic rules
Traffic Rules are at the core definition of the Supervisor traffic management. Each rule allows the definition of the source and destination of the network traffic. The Rules can cover devices distributed across different Virtual Stack Brokers, and will use the physical Uplinks to make sure that the packets reach the intended target.
The first step in creating a rule is defining the traffic sources. Add one or more sources by clicking the Add button, selecting either Add Port Group Source or Add External Device Source, selecting the port group or external device you wish to add, and clicking the checkmark button. Click the Next button, and repeat the process for traffic destinations. Click Next for an overview of the rule, then click Confirm.